
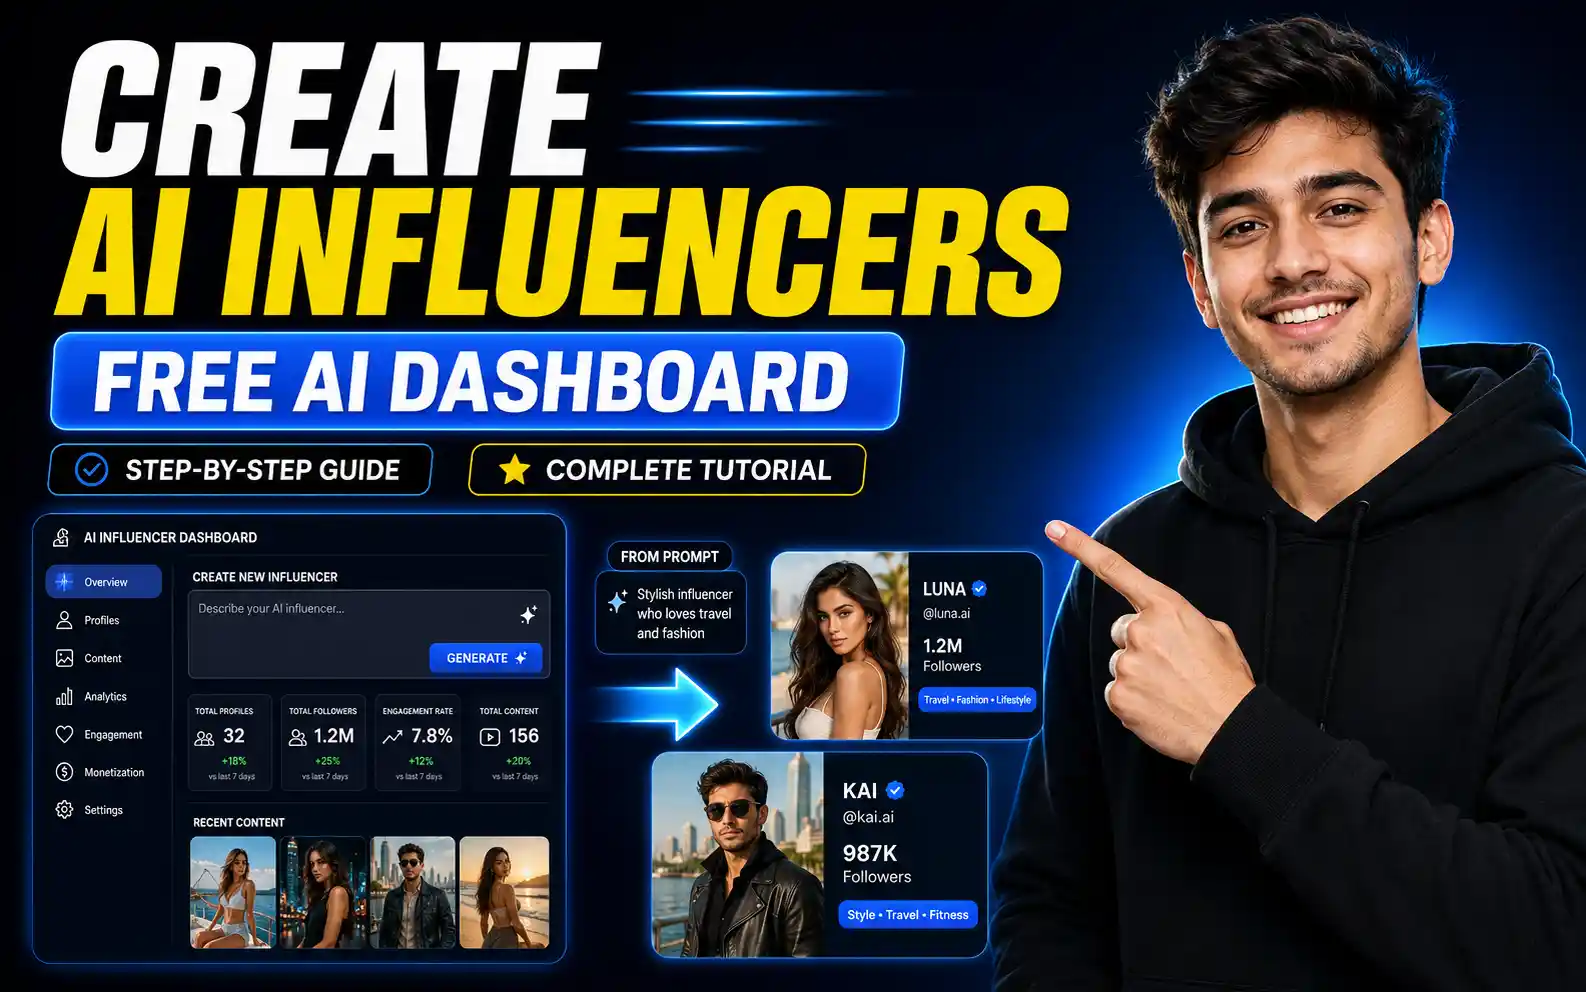
A complete guide to building AI influencers with a customizable dashboard for character creation, photos, outfits, and video content.
How to Create AI Influencers with a Free AI Influencer Dashboard: Complete Step-by-Step Guide
Table of Contents
- Introduction
- What Is an AI Influencer Dashboard?
- Why AI Influencers Are Growing
- What This AI Influencer Dashboard Can Do
- Example AI Influencer Use Cases
- Yoga Instructor
- Finance Creator
- Tech Reviewer
- Travel Creator
- Interior Designer
- Why Use a Dashboard Instead of Manual Prompting?
- Tools Needed to Install the Dashboard
- Step 1: Download Antigravity IDE
- Step 2: Install Claude Code Extension
- Step 3: Download the AI Influencer Project from GitHub
- Step 4: Install Project Dependencies
- Step 5: Connect Higgsfield
- Step 6: Connect Claude API
- How to Create Your First AI Influencer
- Add a Reference Image
- Add a Backstory
- Choose Personality
- Define Appearance
- Choose an Aesthetic Vibe
- Generate AI Influencer Looks
- Create the Influencer Profile
- Generate Character Sheets
- Generate Close-Up and Feature Sheets
- Fill in Influencer Profile Details
- Create a Wardrobe
- Create Home and World-Building Assets
- Add Brand Deals and Products
- Generate Product Sheets
- Generate AI Influencer Photos
- Useful Photo Pose Options
- Generate UGC Videos
- Example UGC Video Ideas
- Example AI Influencer Video Scripts
- Finance Influencer Script
- Tech Influencer Script
- Travel Influencer Script
- Interior Design Influencer Script
- Store Everything in One Dashboard
- Customize the Dashboard with Vibe Coding
- Why This Workflow Represents the Future of AI Tools
- How to Make Money with AI Influencers
- Important Ethical Guidelines
- Best Niches for AI Influencer Pages
- Common Mistakes to Avoid
- Final AI Influencer Workflow
- Final Thoughts
Introduction
AI influencers are becoming one of the most interesting new opportunities in AI content creation. Instead of managing only one human creator account, brands and creators can now build virtual personalities, generate images, create videos, promote products, and post content across different niches.
But the biggest problem is time.
Creating an AI influencer manually usually means switching between many tools. You may need one tool for character images, another for videos, another for prompts, another for product placement, and another for editing. Every time you generate something, you need to rewrite prompts, adjust details, and hope the result stays consistent.
This is where an AI influencer dashboard can make the process easier.
In this guide, you will learn how a free local AI influencer dashboard works, how to install it, how to create your first AI influencer, how to generate character sheets, outfits, photos, brand deals, and UGC videos, and how this workflow can help creators build better virtual influencer content.
What Is an AI Influencer Dashboard?
An AI influencer dashboard is a custom tool that helps you create and manage AI-generated virtual influencers from one place.
Instead of writing every prompt manually, the dashboard lets you fill in structured details about your influencer, such as:
- Name
- Gender
- Age
- Niche
- Backstory
- Personality
- Appearance
- Hair color
- Eye color
- Body type
- Aesthetic style
- Outfits
- Props
- Brand products
- Photos
- Videos
The dashboard then uses those details to generate prompts and send them to image or video generation tools in the background.
This creates a more organized workflow for building consistent AI influencer content.
Why AI Influencers Are Growing
AI influencers are growing because they can be used for many types of content.
Creators and brands can use them for:
- Instagram pages
- TikTok videos
- YouTube Shorts
- UGC-style ads
- Product promotions
- Fashion content
- Fitness content
- Travel content
- Finance education
- Gaming content
- Lifestyle pages
- Brand storytelling
A virtual influencer can be designed for a very specific niche. For example, you can create a yoga instructor, finance educator, gamer, travel creator, hiking influencer, interior designer, or tech reviewer.
The advantage is that the character can be styled, positioned, and scripted for different campaigns without needing a real photoshoot.
What This AI Influencer Dashboard Can Do
The dashboard described in this workflow can help generate and organize complete AI influencer profiles.
It can create:
- AI influencer profile images
- Character sheets
- Close-up facial feature sheets
- Full feature reference sheets
- Custom wardrobes
- Lifestyle photos
- Location-based photos
- Product placement content
- Brand deal assets
- UGC-style videos
- Voice-style content
- Influencer profile details
- Content pillars
- Aesthetic direction
- Dream brand lists
This makes the dashboard useful as an all-in-one workspace for AI influencer creation.
Example AI Influencer Use Cases
You can create different AI influencers for different niches.
Examples include:
Yoga Instructor
A calm wellness influencer who shares yoga poses, meditation content, hydration tips, fitness products, and lifestyle videos.
Finance Creator
A finance-focused influencer who explains budgeting, saving, investing, debt reduction, and wealth-building tips.
Tech Reviewer
A creator who promotes keyboards, gadgets, watches, software, and desk setup products.
Travel Creator
A lifestyle influencer who shares hiking, travel, outdoor gear, destination content, and product placements.
Interior Designer
A home decor influencer who promotes lamps, furniture, design products, and cozy room ideas.
Each character can have their own look, backstory, voice, and content style.
Why Use a Dashboard Instead of Manual Prompting?
Manual AI influencer creation can become messy.
You may need to remember:
- What the influencer looks like
- Which outfit was used
- Which product they promoted
- Which prompt created the best result
- Which model generated the character sheet
- Which brand assets were used
- What the influencer’s niche and personality are
A dashboard solves this by keeping everything in one place.
It gives you a structured system where each influencer has:
- A profile
- A consistent visual identity
- Saved outfits
- Saved props
- Brand products
- Photo settings
- Video settings
- Backstory and content direction
This is useful when managing multiple AI influencer accounts.
Tools Needed to Install the Dashboard
To install and run the AI influencer dashboard locally, you need a few tools.
The workflow in the script uses:
- Antigravity IDE
- Claude Code extension
- GitHub project files
- Node.js / npm install
- Localhost browser preview
- Higgsfield connection
- Claude API connection for better prompts
The exact setup may change depending on the project version, but the basic idea is to run the dashboard locally on your computer and connect it to AI generation services.
Step 1: Download Antigravity IDE
The first step is to download and install Antigravity IDE.
This is where you will open and run the AI influencer dashboard project.
After installing it, open the IDE and prepare the workspace.
Step 2: Install Claude Code Extension
Inside Antigravity, open the extensions section and install Claude Code.
Claude Code can help you inspect, customize, and modify the project.
This is especially useful if you want to “vibe code” your own features later.
For example, you could ask Claude Code to:
- Add a new button
- Change the dashboard layout
- Add a new influencer field
- Improve prompt generation
- Add a new model option
- Fix broken code
- Customize the UI
This makes the dashboard more flexible.
Step 3: Download the AI Influencer Project from GitHub
Next, go to the GitHub project page provided by the creator.
Click Code and download the project as a ZIP file.
After downloading:
- Unzip the folder.
- Open Antigravity IDE.
- Go to the Explorer section.
- Open the unzipped AI influencer project folder.
You should now see the project files inside the IDE.
Step 4: Install Project Dependencies
After opening the project, run the install command.
npm installThis installs all the required dependencies for the project.
Once installation is complete, run the project locally. The terminal should give you a localhost URL.
Copy the localhost link and open it in your browser.
Now the AI influencer dashboard should launch.
Step 5: Connect Higgsfield
The dashboard uses Higgsfield as part of the image and video generation workflow.
Inside the dashboard, click Get Started and connect your Higgsfield account.
The connection flow usually opens Higgsfield in the browser. Log in, allow access, and return to the dashboard.
A paid or credit-supported account may be useful if you want enough generations for images and videos.
Step 6: Connect Claude API
For better prompts, connect your Claude API.
The Claude API can help generate stronger prompt instructions in the background.
To find your API key, go to the Claude platform dashboard and create or manage an API key.
Then paste the key into the dashboard connection field.
You may need credits in your Claude account, but prompt generation usually does not require large usage compared to image or video generation.
How to Create Your First AI Influencer
Once the dashboard is installed and connected, you can create your first AI influencer.
Click Create in the top-right corner.
Then fill in the basic details.
Example:
- Name: Ellie
- Gender: Female
- Age: 26
- Industry: Finance
These basic details help the dashboard understand the type of influencer you want to create.
Add a Reference Image
The dashboard may allow you to upload reference images.
This is optional.
A reference image can help guide:
- Face shape
- Hair style
- Outfit
- Aesthetic
- Overall look
For example, you can upload one reference image for facial style and another reference image for outfit style.
Then you can specify what should be copied, such as:
- Hair
- Facial shape
- Outfit
- Clothing colors
- Overall style
Important note: Use reference images responsibly. Do not impersonate real people without permission, and avoid creating misleading content that suggests a real person said or promoted something they did not.
Add a Backstory
The backstory is one of the most important parts of creating an AI influencer.
A strong backstory makes the character feel more unique.
Example:
“Ellie is an ex-accountant and now a finance YouTuber. Her goal is to help people get out of debt, save money, and build long-term wealth.”
This backstory affects the type of content, outfits, products, and personality the AI will generate.
For example:
- A doctor character may wear professional medical clothing.
- A fitness influencer may wear activewear.
- A travel creator may appear outdoors.
- A finance creator may look polished and professional.
Choose Personality
Next, select the influencer’s personality.
Examples:
- Introverted
- Shy
- Calm
- Bold
- Outgoing
- Confident
- Friendly
- Professional
- Playful
Personality affects the character’s expressions, poses, captions, and content style.
For a finance creator, you may choose bold and outgoing if you want the character to feel confident and camera-friendly.
Define Appearance
Next, define how the influencer looks.
You can set details such as:
- Skin tone
- Hair color
- Hair length
- Hair texture
- Eye color
- Body type
- Build
- Custom features
Example appearance:
- Medium skin tone
- Red hair
- Short wavy hair
- Green eyes
- Athletic build
You can also add custom details such as:
- Glasses
- Tattoos
- Freckles
- Piercings
- Beauty marks
- Specific clothing style
These details help create a more consistent character.
Choose an Aesthetic Vibe
The aesthetic vibe helps define the visual style of your influencer.
Examples include:
- Streetwear
- Cottagecore
- Luxury
- Minimalist
- Fitness
- Corporate
- Travel lifestyle
- Gamer aesthetic
- Soft romantic
- Modern tech
For example, cottagecore may create a romantic, vintage, nature-inspired style.
Choosing the right aesthetic is important because it affects the influencer’s outfits, locations, and overall brand identity.
Generate AI Influencer Looks
After filling in the profile details, generate multiple looks.
The dashboard may provide several model options, such as:
- Higgsfield Soul
- GPT Image 2
- Other image models depending on setup
If you uploaded a reference image, some generation options may work better than others.
The dashboard can generate three different looks. Choose the one you like most because future character sheets, photos, and videos will be based on this identity.
If none of the looks are good, regenerate before continuing.
Create the Influencer Profile
After selecting the best look, create the influencer profile.
This becomes the main identity of the character.
From here, you can generate:
- Character sheet
- Close-up sheet
- Feature sheet
- Outfit variations
- Lifestyle photos
- Product shots
- Videos
Choosing the right base image is important because it becomes the foundation of the influencer’s visual identity.
Generate Character Sheets
Character sheets help keep the influencer consistent across future generations.
A character sheet can include:
- Front view
- Side view
- Back view
- Full body view
- Face close-ups
- Outfit details
- Unique features
- Hair details
- Expression references
These sheets act like a visual reference for future images and videos.
This is especially important because AI influencers need consistency. If the face, hair, or body changes too much, the account becomes less believable.
Generate Close-Up and Feature Sheets
Close-up sheets focus on the influencer’s unique facial details.
These may include:
- Eye shape
- Nose
- Lips
- Jawline
- Hairline
- Skin tone
- Facial structure
- Expressions
- Accessories
Feature sheets help document the character’s unique visual identity.
This can improve future prompt quality because the dashboard has clearer references to work from.
Fill in Influencer Profile Details
After generating the visual foundation, fill in the profile details.
Useful fields include:
- Target audience
- Short description
- Hobbies
- Aesthetic
- Content pillars
- Brand colors
- Dream brands
This is helpful when managing multiple AI influencers.
For example, one influencer may focus on finance, while another focuses on hiking. The profile details help you remember each character’s purpose and content strategy.
Create a Wardrobe
The dashboard allows you to generate and save different outfits.
For example, you can type:
“Brown blazer with a white undershirt and long beige pants.”
The dashboard generates a new outfit look for the character.
If you like the outfit, save it to the wardrobe with a name such as:
“Formal”
You can create multiple wardrobe styles, such as:
- Casual
- Formal
- Travel
- Gym
- Streetwear
- Luxury
- Business
- Outdoor
- Evening
- Brand campaign outfit
This makes it easier to generate consistent photos for different content themes.
Create Home and World-Building Assets
Some dashboards may include a Home section where you can upload or generate a room, studio, apartment, or personal environment for the influencer.
This helps with world-building.
For example, a finance YouTuber might have:
- A modern office
- A clean desk setup
- Bookshelves
- A podcast corner
- A laptop workspace
A travel influencer might have:
- Hotel rooms
- Hiking locations
- Airport scenes
- Beach environments
World-building makes the influencer feel more believable and consistent.
Add Brand Deals and Products
The dashboard can also help manage brand deals.
You can add a brand or import previous brand assets.
Examples of products include:
- Watch
- Keyboard
- Water bottle
- Lamp
- Skincare product
- Fitness gear
- Tech gadget
- Clothing item
The dashboard can generate product reference sheets and then use those props inside the influencer’s photos or videos.
This is useful for creating UGC-style ads.
Generate Product Sheets
Product sheets help the AI understand how a product looks from different angles.
A product sheet may show:
- Front view
- Side view
- Back view
- Detail view
- Packaging
- Color
- Texture
- Logo placement
- Shape
This improves product placement in future images and videos.
For example, a watch product sheet can help the AI show the watch naturally on the influencer’s wrist.
Generate AI Influencer Photos
The Photos section allows you to create custom lifestyle images.
You can choose:
- Location
- Time of day
- Pose
- Expression
- Outfit
- Props
- Product placement
Example settings:
- Location: City street
- Time: Golden hour
- Pose: Candid
- Expression: Smiling
- Outfit: Formal
- Prop: Watch
Then the dashboard generates custom images of the influencer in that setup.
This is useful for Instagram posts, profile content, brand photos, and lifestyle campaigns.
Useful Photo Pose Options
Common pose options may include:
- Handheld selfie
- Candid pose
- Hair touch
- Hip pop
- Over-the-shoulder
- Facing away
- Sitting
- Walking
- Holding product
- Looking at camera
- Lifestyle action pose
These pose options make it easy to create variety without rewriting prompts each time.
Generate UGC Videos
The dashboard can also help create AI influencer videos.
To make a video, enter what the influencer should say.
Example script:
“If you want cozy lighting in your house, you have to check out this lamp. Look how cute it is.”
Then select:
- Product
- Outfit
- Voice style
- Accent
- Video format
- Resolution
- Duration or mode
The AI then generates a UGC-style video of the influencer speaking and promoting the product.
Example UGC Video Ideas
You can create UGC-style videos for:
- Product reviews
- Unboxing content
- Lifestyle recommendations
- Travel gear promotions
- Finance tips
- Fitness product demos
- Desk setup reviews
- Home decor recommendations
- Fashion try-ons
- Outdoor product promotions
This type of content can be useful for social media ads, influencer pages, and brand campaigns.
Example AI Influencer Video Scripts
Finance Influencer Script
“Here is one simple money habit that changed how I save. Every time I get paid, I move a fixed percentage into savings before spending anything else.”
Tech Influencer Script
“If you want a keyboard that feels premium and sounds amazing, this one is worth checking out. The aluminum build feels solid, and the typing sound is very satisfying.”
Travel Influencer Script
“We are hiking in Greece today, and staying hydrated is so important on long sunny trails. This bottle has been a lifesaver.”
Interior Design Influencer Script
“If you want to make your room feel warmer and more cozy, try adding soft lighting. This lamp instantly changes the mood of the space.”
Store Everything in One Dashboard
One of the biggest benefits of this workflow is organization.
Instead of keeping images, videos, prompts, references, and product details scattered across different platforms, the dashboard stores them in one place.
This helps you manage:
- Multiple AI influencers
- Different niches
- Outfits
- Brand deals
- Photo shoots
- Video scripts
- Product placements
- Visual identity
- Character backstory
- Content strategy
For anyone managing several AI influencer pages, this can save a lot of time.
Customize the Dashboard with Vibe Coding
Because the dashboard runs locally, it can be customized.
You can use tools like Claude Code or Antigravity to modify the project.
Possible customizations include:
- Add new profile fields
- Add more image models
- Change dashboard layout
- Add new photo presets
- Add more pose options
- Add video templates
- Add brand campaign tracking
- Add post scheduling fields
- Add caption generation
- Add analytics tracking
- Add export options
This makes the dashboard flexible for your own workflow.
However, changing the code can break the project, so save a backup before making major edits.
Why This Workflow Represents the Future of AI Tools
This dashboard shows an important shift in how people may use AI in the future.
Instead of opening separate tools one by one, creators can build custom dashboards that connect multiple AI tools together.
For example:
- One tool generates prompts.
- One tool generates images.
- One tool creates videos.
- One tool stores brand assets.
- One tool manages character identity.
- One tool organizes content workflow.
This kind of custom AI workflow can be more powerful than using individual tools separately.
The future of AI content creation may be personalized dashboards built around specific problems.
How to Make Money with AI Influencers
AI influencers can be used for several monetization strategies.
Possible ways to make money include:
- UGC-style ad creation
- Product promotion content
- Brand collaboration videos
- Instagram theme pages
- TikTok content pages
- Affiliate marketing
- Sponsored posts
- Digital product promotion
- AI influencer management services
- Creating influencer assets for clients
- Selling custom AI character packs
- Running niche content pages
For example, you could create a fitness influencer and use it to promote fitness products, supplements, workout apps, or activewear.
Or you could create a finance influencer and use it to promote budgeting tools, finance newsletters, or educational content.
Important Ethical Guidelines
AI influencers should be used responsibly.
Follow these rules:
- Do not impersonate real people without permission.
- Do not claim an AI character is a real person if it is not.
- Do not create fake testimonials from real brands.
- Do not use real people’s likeness for ads without consent.
- Clearly follow platform disclosure rules.
- Use your own scripts and assets when possible.
- Avoid misleading audiences about paid promotions.
AI influencer content can be powerful, but trust and transparency are important for long-term success.
Best Niches for AI Influencer Pages
Some strong niches include:
- Fitness
- Yoga
- Travel
- Finance
- Fashion
- Beauty
- Tech
- Gaming
- Interior design
- Home decor
- Food
- Luxury lifestyle
- Outdoor adventure
- Productivity
- Skincare
The best niche is one where products, content ideas, and audience interest naturally overlap.
For example, travel influencers can promote bags, bottles, hotels, apps, and outdoor gear. Tech influencers can promote keyboards, monitors, gadgets, desk setups, and software.
Common Mistakes to Avoid
Avoid these mistakes when creating AI influencers:
- Changing the face too often
- Not creating character sheets
- Not saving outfit references
- Using inconsistent styles
- Picking a niche that has no monetization path
- Generating random images without a content strategy
- Not defining target audience
- Ignoring brand identity
- Using reference images without permission
- Creating misleading UGC ads
- Not organizing scripts, products, and assets
Consistency is what makes an AI influencer feel believable.
Final AI Influencer Workflow
Here is the complete workflow:
- Install Antigravity IDE.
- Install Claude Code.
- Download the dashboard from GitHub.
- Open the project folder.
- Run
npm install. - Launch the local project.
- Connect Higgsfield.
- Connect Claude API.
- Create a new influencer profile.
- Add name, gender, age, and niche.
- Upload optional reference images.
- Write a backstory.
- Choose personality.
- Define appearance.
- Select aesthetic vibe.
- Generate multiple looks.
- Pick the best identity.
- Create character sheets.
- Generate close-up and feature sheets.
- Fill in target audience and content pillars.
- Create wardrobe options.
- Add brand products.
- Generate photos.
- Create UGC videos.
- Save everything inside the dashboard.
- Customize the tool if needed.
This creates a repeatable workflow for building AI influencer content.
Final Thoughts
Creating AI influencers manually can take a lot of time because you have to manage prompts, images, videos, outfits, references, and brand assets across multiple platforms.
A free local AI influencer dashboard can simplify this process by giving you one place to create, organize, and manage your virtual creators.
You can build a unique AI influencer, generate character sheets, create outfits, add brand products, produce photos, and generate UGC-style videos from one organized workflow.
The real power is customization. Because the dashboard runs locally, you can modify it, add your own features, and build a system that fits your exact creative workflow.
AI influencers are not just about generating pretty images. They are about building consistent characters, strong niches, useful content, and repeatable brand workflows.
If you want to create AI influencer pages, UGC ads, or virtual creators, a structured dashboard like this can save time and make the process much easier.

Frequently Asked Questions
What is an AI influencer dashboard?
An AI influencer dashboard is a tool that helps you create, organize, and manage virtual influencers, including their profiles, character sheets, outfits, photos, products, and videos.
Can I create AI influencers for free?
You can run a local dashboard for free if the project is provided as a free download. However, image generation, video generation, and API usage may require credits or paid accounts depending on the connected services.
What tools are needed to run the AI influencer dashboard?
The workflow uses tools such as Antigravity IDE, Claude Code, a GitHub project folder, npm install, localhost, Higgsfield connection, and Claude API for better prompt generation.
Why do AI influencers need character sheets?
Character sheets help preserve the same face, hairstyle, body type, outfit details, and unique features across future images and videos.
Can AI influencers create UGC videos?
Yes, the dashboard workflow can create UGC-style videos by combining the influencer profile, product assets, script, outfit, voice style, and video generation tools.
Can I customize the AI influencer dashboard?
Yes, because the dashboard runs locally, you can customize it with coding tools. You can add fields, change layouts, add presets, improve prompts, or connect new services.
How can AI influencers make money?
AI influencers can support monetization through UGC ads, affiliate marketing, sponsored-style content, product promotions, theme pages, digital products, and client content services.
Is it safe to use real people as reference images?
You should only use real people’s likeness with proper permission. Avoid impersonation, fake endorsements, or misleading content, especially for ads and brand promotions.